Android Auto has made driving easier by connecting your phone to your car’s dashboard. But can you use it on a motorcycle? The answer is YES. While it’s not as common, more riders are adding Android Auto to their bikes for better navigation, music, and hands-free control. In this post, we’ll explore how Android Auto works on motorcycles, how to set it up, and whether it’s worth the investment.
Can I Use Android Auto on My Motorcycle?
Yes, you can use Android Auto on a motorcycle, but there are a few things to keep in mind. Unlike cars, motorcycles don’t come with built-in Android Auto support. However, with the right hardware, like an aftermarket head unit or a compatible display, it’s possible to set up Android Auto on your bike. The key is ensuring that the system is designed for motorcycle use, meaning it’s built to withstand the elements, vibrations, and other challenges that come with riding.
Some motorcycles have factory-installed infotainment systems that support Android Auto, but most riders will need to add it aftermarket. There are a few options available, from handlebar-mounted displays to full touchscreen units, allowing you to access your apps safely while riding.
Motorcycles with Android Auto Support
These motorcycles come with Android Auto support, typically through factory-installed head units or infotainment systems:
-
Harley-Davidson: Models with Boom! Box GTS system (e.g., Road Glide, Street Glide, Electra Glide).
-
Indian Motorcycles: Ride Command system on Chief, Chieftain, Roadmaster, and Challenger models.
-
Honda Gold Wing: Factory-installed Android Auto on most Gold Wing models.
-
BMW Motorrad: ConnectedRide system on select models like the K1600 and R1250.
-
Yamaha: Aftermarket solutions for models like the FJR1300 and Tracer 900.
-
Kawasaki: Aftermarket systems for the Ninja H2, Z900, and Vulcan 1700.
-
Suzuki: Aftermarket options available for models like the GSX-S1000 and V-Strom 1050.
-
Ducati: Aftermarket solutions for models like the Multistrada V4 and Panigale V4.

How to Add Android Auto to Your Motorcycle?
If your motorcycle doesn't come with Android Auto, don’t worry—there are 3 ways to add it. Below are the practical methods with detailed steps.
Install an Aftermarket Head Unit with Android Auto
This is the most comprehensive way to add Android Auto to your motorcycle. An aftermarket head unit replaces or supplements your bike's existing infotainment system.
Steps:
1. Choose Your Head Unit
Select an Android Auto-compatible head unit designed for motorcycles.
2. Remove the Existing Unit
If your bike already has an infotainment system, carefully remove it by unscrewing the brackets and unplugging the power and audio connections.
3. Mount the New Head Unit
Position the head unit in a suitable location. It should be secure and within easy reach for safe operation. Mounting brackets or kits are often included with the unit.
4. Connect the Wiring
Wire the new unit to the motorcycle’s electrical system. This typically involves connecting the head unit to the bike’s battery for power, and the audio system. You may need to use wiring harness adapters, which can simplify the process.
5. Install the Display and Controls
Attach the display to the motorcycle, ensuring it's weatherproof. Route any wires neatly to avoid obstruction. Connect the unit to the handlebars for any manual controls.
6. Connect Your Phone
Use a USB cable to connect your Android phone to the head unit. If your head unit supports Bluetooth, you can pair your phone wirelessly.
7. Set Up Android Auto
Follow the on-screen prompts to set up Android Auto. You may need to download the Android Auto app if it’s not already installed on your phone.
Install a Handlebar-Mounted Display
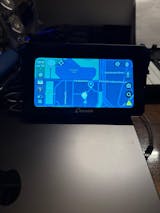
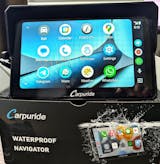
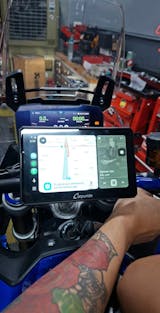
If you prefer a smaller, more compact solution, handlebar-mounted displays are a great option. These displays give you quick access to Android Auto features without the bulk of a full head unit. Brands like Carpuride can offer Motorcycle Android Auto like Carpuride W702 suitable for all motorcycle handlebars.
Steps:
1. Choose a Handlebar Display
Look for an Android Auto-compatible handlebar-mounted display. Brands like BikerTech or Navdy offer options designed for motorcycles.
2. Mount the Display
Use the included mount to attach the display to your handlebars. Ensure it is securely fastened and easily visible while riding.
3. Connect the Display to Power
The display will require power from your motorcycle's electrical system. Use the provided cables to connect it to the bike's battery or fuse box.
4. Connect Your Phone
Plug your phone into the display via USB or pair it through Bluetooth, depending on the system.
5. Set Up Android Auto
Open the Android Auto app on your phone and follow the setup instructions on the screen. You’ll have access to navigation, music, and other apps directly on the handlebar-mounted screen.
Use a Smartphone Mount and Bluetooth
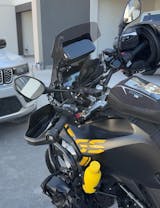
If you’re not looking to invest in a new head unit or display, using a smartphone mount with Bluetooth can still get you the benefits of Android Auto. This method allows you to use your phone as the central interface, but controls and audio come through your helmet or Bluetooth speakers.
Steps:
1. Choose a Smartphone Mount
Pick a sturdy, weatherproof mount (e.g., RAM Mounts or Quad Lock) that fits your bike and can hold your phone securely while riding.
2. Mount the Phone
Attach the mount to a safe, visible spot on your handlebars or mirror, ensuring the screen is readable but not obstructing your view of the road.
3. Set Up Bluetooth Audio
Pair your phone with a Bluetooth-enabled helmet or speaker system. Popular options include Sena and Cardo systems for helmets, or Bluetooth speakers for motorcycles.
4. Connect Your Phone to Android Auto
Plug your phone into the mount (or keep it on Bluetooth if you prefer wireless control) and open the Android Auto app. You can now control navigation and music via voice commands or the bike’s audio system.
5. Use Voice Commands for Safety
Since the phone is mounted, it's easy to use voice commands through the helmet’s microphone, keeping your hands on the handlebars.

Cost of Adding Android Auto to a Motorcycle
The cost of adding Android Auto for motorcycle depends on the installation method. Here’s a concise breakdown:
Aftermarket Head Units Cost
$250 - $1,000+ This option offers the most features and integration, including built-in GPS and advanced audio systems. The price typically includes the head unit, wiring harnesses, and mounting hardware. Professional installation, if needed, may cost an additional $100 - $300.
Handlebar-Mounted Displays Cost
$100 - $400 A more affordable and simpler option, these displays include the screen and mounting equipment. They’re easy to install, but wiring to your bike’s power source might incur minor extra costs.
Smartphone Mount and Bluetooth Cost
$30 - $150 The cheapest and simplest solution, this setup includes a phone mount and possibly a basic Bluetooth system. If you already own a Bluetooth helmet or speakers, you’ll only need the mount. Upgrading to a Bluetooth-enabled helmet or speakers could add $100 - $300.
Android Auto vs. Apple CarPlay: Which is Better for Motorcycles?
When choosing between Android Auto and Apple CarPlay for your motorcycle, both offer great connectivity, but the best option depends on your device and preferences.
Verdict
If you use an Android phone, Android Auto is the better choice with more customization and app flexibility. For iPhone users, Apple CarPlay offers a streamlined, user-friendly experience tailored to Apple devices.
Android Auto: Flexible and Customizable
Android Auto works with most Android devices (Android 5.0 or higher) and supports a variety of third-party apps like Google Maps, Waze, Spotify, and Amazon Music, giving you plenty of options for navigation and entertainment. Its interface allows for more customization, and Google Assistant provides seamless hands-free control for navigation, messaging, and media playback. This makes it ideal for riders who value flexibility and app variety.
Apple CarPlay: Simple and User-Friendly
Apple CarPlay is designed exclusively for iPhones (iPhone 5 or newer) and offers a clean, straightforward interface. While it has fewer customization options and supports a more limited selection of third-party apps, it excels in simplicity and ease of use. Siri integration allows for hands-free navigation, texting, and music control, making it a reliable choice for riders looking for a hassle-free, streamlined experience.
Final Thoughts
For most motorcyclists, Android Auto is the better option due to its broader compatibility and customization features. However, if you’re already embedded in the Apple ecosystem, Apple CarPlay offers a smoother, more consistent experience. Either way, both systems make navigating, controlling media, and staying connected on the road much easier and safer.
Read More:
How to Watch Netflix on Android Auto? Complete Guidance for You
Is Apple CarPlay Worth It for Older Cars? Here's the Final Answer
Why is Android Auto Not Working? 10 Fixes You Can Try Today


