For motorcycle enthusiasts, the road isn’t just about the ride — it’s about the experience. Whether you're cruising down a quiet highway or navigating through city streets, music can elevate your journey.
Installing an aftermarket motorcycle radio is one of the best ways to enhance your riding experience. With the right stereo, you can enjoy your favorite tunes, podcasts, and GPS instructions, all while keeping your hands on the handlebars and your eyes on the road.
In this guide, we’ll walk you through the step-by-step process of installing an aftermarket motorcycle radio, the key factors to consider when choosing the right system, and why upgrading your bike's entertainment setup can make every ride more enjoyable.
Whether you're a seasoned rider or new to motorcycle upgrades, this post will provide you with everything you need to know.
Step-by-Step Guide to Installing an Aftermarket Motorcycle Radio
Installing an aftermarket radio on your motorcycle may seem like a daunting task, but with the right tools and instructions, it can be a straightforward process. Follow these steps to upgrade your bike's audio system and enjoy an enhanced riding experience.
Tools and Materials Needed:
-
New aftermarket motorcycle radio
-
Wiring harness (specific to your motorcycle and radio model)
-
Screwdrivers (Phillips and flathead)
-
Wrenches and socket set
-
Electrical tape
-
Zip ties
-
Multimeter (for testing connections)
-
Drill (if mounting requires new holes)
-
Motorcycle-specific mounting kit (handlebar or dash mount)
Preparation:
-
Safety Precautions: Always wear gloves and protective eyewear during the installation. Make sure you are working in a well-lit area and have adequate space.
-
Disconnect the Battery: Before starting any work, disconnect the motorcycle's battery to prevent any electrical shocks or short circuits while wiring the new radio.
Removal of Existing Radio:
If your motorcycle already has a stock radio, follow these steps:
-
Remove the Faceplate or Panel: Use the appropriate tools to remove the faceplate or panel surrounding the radio.
-
Disconnect the Wiring: Carefully disconnect the power, speaker, and antenna wires. Take note of the wiring setup to make reconnecting easier later.
-
Remove the Radio: Unscrew and remove the old radio from its mount.
Wiring and Connections:
-
Understand the Wiring Diagram: Review the wiring diagram provided with your new radio. Ensure you have the correct wiring harness for your motorcycle.
-
Connect Power and Ground Wires: Attach the power (usually red) and ground (black) wires from the new radio to the corresponding wires in your motorcycle’s electrical system. Use electrical tape to secure connections.
-
Connect the Speakers: Attach the speaker wires from the radio to your motorcycle’s speakers. Make sure to follow the positive and negative wire markings for each speaker.
-
Antenna Connection: If your radio includes an antenna, connect it to the appropriate input on the radio.
Mounting the New Radio:
-
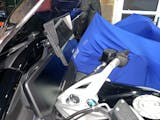
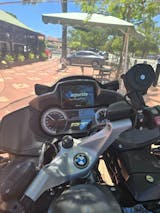
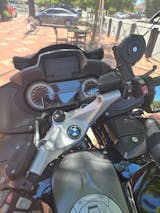
Choose the Mounting Location: Depending on your radio type, select a location that is both accessible and safe. Popular options include handlebar mounts or dash-mounted systems.
-
Secure the Radio: Using the mounting kit, secure the radio in place. If necessary, drill holes for screws and ensure the radio is fastened tightly to avoid vibrations during the ride.
-
Route the Wires Neatly: Use zip ties to bundle and secure any loose wires, ensuring they don’t interfere with your bike’s operation or your safety.
Testing the Installation:
-
Power On and Check Functionality: Reconnect the motorcycle's battery and power on the radio. Test the sound, controls, and connections to ensure everything is working properly.
-
Troubleshoot Common Issues: If the radio doesn’t power on, check the fuse, wiring connections, and power supply. If there’s no sound, verify the speaker connections.
Finalizing the Installation:
-
Secure Wires and Components: Once you’ve confirmed everything works, double-check all wiring to ensure nothing is loose or exposed.
-
Reassemble Panels or Casings: If you had to remove any panels to access the radio space, carefully reassemble them, ensuring a snug fit.

Factors to Consider When Buying an Aftermarket Motorcycle Stereo
Choosing the right motorcycle radio for your motorcycle is essential for performance and compatibility. Here are the key factors to consider:
-
Types of Motorcycle Radios:
-
Handlebar-Mounted Radios: Easy access and control with larger buttons, often waterproof, designed for quick adjustments while riding.
-
Dash-Mounted Radios: Integrated into the dash for a seamless look, offering compact design but requiring more installation work.
-
Bluetooth-enabled Radios: Allow wireless streaming from your smartphone, providing hands-free operation.
-
FM/AM Radio: Traditional radio stations for a simple listening experience.
-
Integrated GPS Radios: Built-in GPS for turn-by-turn directions, great for long-distance riders.
-
-
Power Output (Watts): The power output determines sound clarity and volume. A 50w to 200w system is sufficient for most riders, while 600w or 1200w radios provide louder sound but can drain the battery faster.
-
Compatibility: Ensure the radio fits your motorcycle’s electrical system. Some radios come with universal wiring harnesses, while others are model-specific.
-
Durability and Weather Resistance: Choose motorcycle radio waterproof systems with high IPX ratings to withstand harsh weather conditions like rain or dust.
-
Battery Consumption: Higher wattage and Bluetooth features may consume more battery power. For longer rides, choose radios with energy-efficient designs.
-
Additional Features:
-
Hands-Free Operation: Voice control or integrated microphones allow you to make calls or adjust settings without taking your hands off the handlebars.
-
App Integration: Radios that support Spotify, Pandora, and other apps provide more music options.
-
Voice Control: Allows hands-free control of songs, volume, and calls.
-
Customizable Sound Settings: Equalizer options let you adjust sound quality to your preference.
-
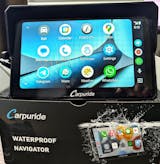
CarPlay and Android Auto Integration: Features like those in Carpuride models allow seamless phone integration for music, navigation, and hands-free calls.
-
Is It Illegal to Ride a Motorcycle While Listening to Music?
In the U.S., the legality of listening to music while riding a motorcycle varies by state. For example, California’s Vehicle Code 27400 prohibits motorcyclists from using both ears to listen to music, meaning wearing headphones or earphones that block external sounds is illegal.
However, using a single earphone or Bluetooth devices that leave one ear free to hear the surroundings may be allowed. Similarly, New York’s Vehicle and Traffic Law 375 bans the use of headphones while riding, but it does permit Bluetooth communication systems integrated into helmets.
In cities like New York City, there are also noise ordinances that can penalize riders for playing music too loudly, as it can disturb the peace. Always check local regulations, as some states allow Bluetooth headsets for communication, but wearing headphones that block both ears is generally prohibited due to safety concerns.
Why Buy an Aftermarket Motorcycle Radio from Carpuride?
From the Brand Perspective:
-
Reputation for Quality: Carpuride is a trusted brand known for delivering reliable and durable motorcycle radios that cater to both casual riders and enthusiasts. With a focus on innovation, Carpuride ensures top-notch performance at competitive prices.
-
Easy Installation: Carpuride radios are designed for quick and hassle-free installation on the motorcycle handbars.
From the Product Perspective:
-
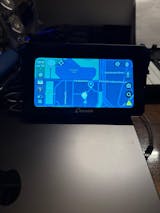
GPS Navigation: Carpuride motorcycle radios provide GPS and navigations via CarPlay or Android Auto connection, and help riders keep their focus on the road.
-
Safety Features: Many Carpuride models come with Bluetooth integration for hands-free calls, ensuring you stay connected while minimizing distractions, enhancing both convenience and safety.
-
Weather Resistance: Carpuride radios are built to withstand tough conditions, featuring IP67 waterproof and dustproof designs that ensure reliable performance no matter the weather.

Conclusion
An aftermarket radio is one of the best motorcycle upgrades enhances both your riding experience and safety. With features like GPS navigation, Bluetooth connectivity, and weather resistance, these radios provide the perfect balance of functionality and durability for any rider.
Carpuride offers more than just high-quality sound—it brings the best portable carplay display for motorcycle features like built-in GPS for smooth navigation, Bluetooth for hands-free safety, and rugged, weather-resistant designs built for the road.
Whether you're tackling long trips or short rides, Carpuride combines reliability, ease of use, and cutting-edge technology in one package. By choosing Carpuride, you’re investing in a better, more enjoyable ride, no matter the conditions.
Read More:
Can I use Android Auto on my motorcycle?
How to Commute Using a Motorcycle? A Complete Guide
How to install a stereo on a motorcycle?
Is Apple CarPlay Worth It for Older Cars? Here's the Final Answer


